Assessing your qualifications to install a ceiling fan
You can pick up a ceiling fan kit at most hardware stores, and if you're comfortable performing all the installation steps, you could save yourself a chunk of change by installing it yourself. But before you make that decision, it's time for a gut check.
While ceiling fan installation is not overly complicated, it's a job that typically involves the following:
- Working with electrical wiring and observing electrical safety
- Cutting holes in drywall
- Using an electric drill
- Standing on a ladder while supporting the full weight of the fan
You should also keep in mind that some ceiling fan installations are easier than others. If you're replacing an existing ceiling fan or installing one in place of a light fixture, there should be no need for rewiring or cutting new holes in walls.
Attic access to the installation site can also make the job much easier. Factors that make a job harder include lack of attic access, high or vaulted ceilings and lack of existing wiring.
Supplies needed
Before installing a ceiling fan, you must shut off the circuit breakers supplying power to any fixtures or outlets you'll be working with. You should also fully unpack your fan kit and read the included installation guide. Verify that all the parts are included, and gather the other tools you'll need, which may include:
- Electric drill
- Pliers
- Crescent wrench
- Wire cutters
- Screwdriver
- Ladder
- Drywall saw
- Safety goggles
Choosing where to install your ceiling fan
The 2 big questions you must answer before installing a ceiling fan are where you want to install it and how you'll be supplying power to that location. Factors to consider will vary depending on whether you're installing a new fan, replacing an old one or retrofitting an old light fixture.
If you're replacing an existing fan or light fixture, your decision on where to install your new fan is easy. You'll want to carefully disassemble the fixture, beginning with light bulbs and decorative glass. Remove the screws holding the light fixture to the electrical box, then disconnect the plastic wiring connectors to remove the fixture completely.
If you're lucky, the electrical box will be installed directly to a ceiling joist. That means you'll be able to bracket your fan to the joist to give it the support it needs. If the electrical box is installed between two joists, you'll need to install a support bar that is rated for fan support.
When installing a fan where no fixture exists, you have the same options for structural support: either bracket the fan directly to a ceiling joist or install a support bar between joists. The greater challenge will be choosing the best solution for supplying power, which is usually the method that requires the least amount of drywall cutting.
With attic access to the installation site, homeowners who are experienced with electrical rewiring can route new wiring from any electrical access point in the attic. If there is no such access, the wiring should be routed from the nearest outlet or switch, which is usually a wall switch in the room where the ceiling fan is being installed. This will often require 1 or more small holes to be cut in the drywall so that the wiring can be routed around corners.
Install a rated electrical box for a retrofit
Ceiling fans must be installed with electrical boxes that are stamped as being rated for fan support. If you're installing a ceiling fan in place of a small light fixture, you'll probably need to replace the electrical box with one built to handle fan vibrations. Disassemble the light fixture, undo the wiring connections and remove the existing wiring box by removing the screws holding it in place.
Some support bars attach directly to the joists with screws, but you'll need attic access to install them. Otherwise, retrofit fan boxes come with an expandable cross piece with spikes on the ends. Twisting the crosspiece makes it expand and dig its end spikes into the ceiling joists. This holds it firmly in place.
With the old box removed, insert the retrofit box completely in the hole and rotate it with your hand until you can position it so that the box protrudes from the hole and the crosspiece is perpendicular to the joists.
Don't forget to work the wires into the wiring box before you get everything set in position. Twist the crosspiece with a wrench until the end spikes dig into the joists. With the electrical box securely in place, reattach the ground wire before proceeding.
How to assemble and install the ceiling fan
Once you have your fan-rated electrical box securely in place and electrical access to the installation point, you're left with a step-by-step assembly job. The best guide from this point on is the ceiling fan installation booklet included with the fan, but the basic steps will be similar to the following:
1. Secure the fan mounting bracket to the electrical box. Most ceiling fans have a mounting bracket that screws directly onto the new wiring box and some newer models have plastic foam pads to help reduce vibration and noise. Just hold the bracket in place and attach it with the screws that come in the wiring box.
Many mounting brackets are shaped to accommodate a plastic half-ball joint fitted to hold a fan mounting down rod which supports the ceiling fan motor. The half-ball joint rides the mounting bracket loose to allow a spinning fan to vibrate and wobble without making noise or letting all that motion twist the fan wiring box loose from the ceiling.
2. Install the decorative ceiling plate over the mounting bracket. This process varies by model and may involve the use of screws, brackets, adhesives or some combination to attach the plate.
3. Assemble the ceiling fan motor and canopy per manufacturer instructions.
4. Insert wires through the cowling and then through the mounting down rod. Then, insert the down rod into position at the top of the motor. The down rod will be held onto the motor with either a metal bolt or stud.
5. Attach the ceiling fan to the mounting bracket before connecting the wiring, if applicable. Some ceiling fan kits are designed to hold the fan in place as you connect the wiring. Look for a hook on the underside of the mounting bracket.
The cowling cover has several screw holes in it, and you can put the hook through one of these to hold the motor up while you make the wiring connections. If your kit isn't designed this way, you'll need a partner to hold the fan in place while you make this connection.
6. Use plastic ceiling fan wiring connectors to connect the fan's wiring to your home wiring per manufacturer instructions. Basic ceiling fans usually come with 4 wires:
- Black for hot or load
- Blue (also hot) for the fan's light fixture
- White for neutral
- Green for ground
The black and blue wires let you connect the ceiling fan and lights to separate wall switches if appropriate wiring is available. For our purposes, we're going to wire both the fan motor and fan lights to 1 switch.
Insert the blue and the black wires into a wire connect and twist until it's snug. Give each wire a little tug to make certain they're firmly in place. Do the same thing with the white neutral wires. The green wire is ground and that connects with the bare grounding wire in the Romex sheath. When all the connections are complete, carefully push the wires up into the wiring box to keep them safe.
7. Secure the wiring inside the electrical box and install the ceiling fan securely to the mounting bracket. Carefully lift the cowl cover off the hook and slip the half-ball joint into the mounting bracket. If the bracket has a little metal tab, make sure it lines up with the groove in the half-ball joint. Check that the whole motor assembly is free to move and rock in the bracket. Raise the cowling cover into place and fasten it with screws.
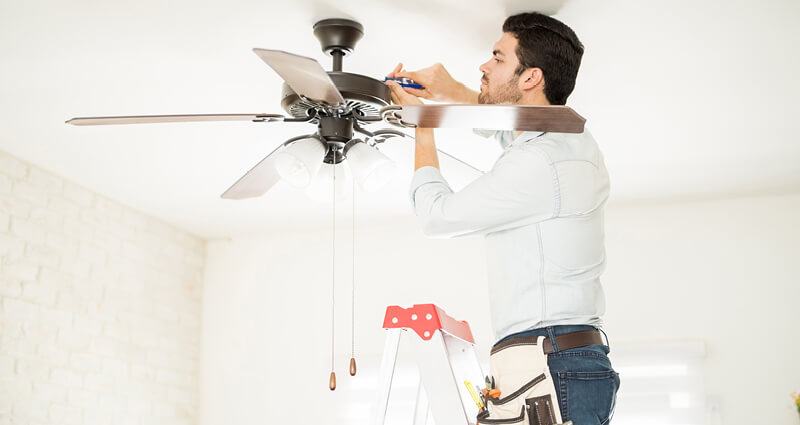
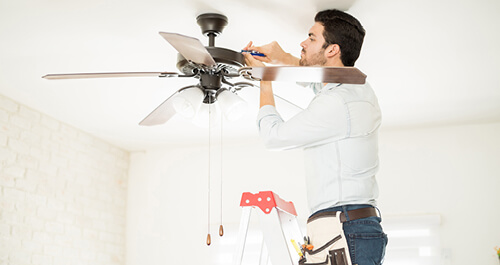
8. Install the ceiling fan blades and light kit, if applicable, per the manufacturer's instructions. Using a magnetic-tipped screwdriver makes this job a lot easier. Insert one of the blade-mounting screws into the blade's bracket. Then, keeping the screw in place with the magnetic screwdriver, guide the bracket into position on the fan motor and insert the screw.
Do not tighten this screw until you have inserted the second screw – this way, you can adjust how the blade fits in place. Repeat this process for each blade. Also, remember that you may need to re-tighten blade mounting screws after 6 to 8 months.
9. Connect the light fixture. Older ceiling fans may have just a blue wire and white wire that you'll need to connect to corresponding wires in the light fixtures. Newer ones, meanwhile, may have plastic modular connectors that plug right into a corresponding mate.
Once this wiring is finished, secure the fixture into place with the fixture's mounting screws. Because you may need to leave the light hanging by its wires if you drop one of these screws, never put on any glass light shades or light bulbs before the fixture is fastened into place.
As with most home improvement projects that involve electrical wiring and cutting holes in walls, the best course of action depends on the DIY abilities of the homeowner. Improper ceiling fan installation could result in the fan becoming unstable and falling, and faulty ceiling fan wiring could pose a fire risk.
Professional installation offers peace of mind and quality assurance, although it's likely to cost between $100 and $300. If you're comfortable enough with the necessary steps, doing it yourself can save you money while giving you the satisfaction of a job well done.