Where does the moisture come from?
The bulk of the moisture entering your home sneaks in through drafts and air leaks. Basements, however, have the additional feature that most of them are made of concrete, which is porous. You might notice your basement feels more humid after rain storms or when snow melts. This is because water can also enter through the walls and floor by capillary action and by water vapor diffusion. Since basements are below ground, they tend to be cooler so water vapor that enters will be more likely to condense into liquid water. This is especially noticeable in during humid weather in summer when water vapor from outside enters and condenses everywhere, making the room damp for months.
During the winter, the concrete walls of uninsulated basements get cold. Water vapor from inside the basement will condense on the cold walls and make them wet.
Consequently, without both sealing drafts and blocking water vapor, any efforts at insulating the basement will just trap moisture inside the basement, which could damage your home’s structural elements and furnishings, while also providing a breeding ground for mold.
How to seal your basement
Seal and insulate holes
First, look for and seal ANY holes in the foundation inside and out to reduce the cold air and moisture getting into your home. This includes around pipes, electrical connections or cables that enter the house. Repair or replace any basement windows that are drafty or fail to close snugly. This will also help keep out small, furry pests that might want to spend the winter with your family.
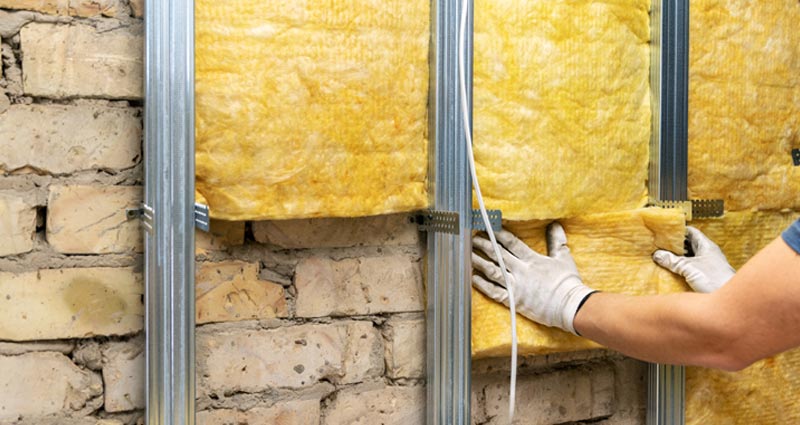
Next, seal and insulate the space where your flooring joists meet the banding joist. These are called joist bays. In the past, it was once recommend to use paper-faced fiberglass insulation in a basement. However, it was discovered that this often allowed water vapor through and caused condensation to form against the banding joists. The result was mold and mildew growth and rotting wood.
The smart and inexpensive way to insulate joist bays is to use extruded polystyrene (XPS) foam insulation panels cut to size to fit inside the bay and "glued" in with expanding foam. When the expanding foam hardens, trim away the excess and cover the foam with a piece 1/2" thick drywall to meet fire code. Since the foam panel here works as an excellent vapor barrier, you can also add fiberglass insulation after placing the drywall fire block. This can also be done with spray foam.
Sealing and insulating basement walls will reduce humidity and thermal loss, but depending on the design of your home and your plans for your basement, you might consider insulating the ceiling and floor, as well.
But before you get into how to insulate basement ceiling tiles, consider that doing so will create a thermal barrier between your heated home and basement, which will leave your basement colder without supplemental heating. If you’re planning to use the basement as an extra bedroom or living space, consider looking into how to insulate basement floor panels so that it’s even warmer in winter and comfortable to walk around barefoot.
Keep gutters clean
Keep your rain gutters clean of debris and run your downspouts so that rain run-off is channeled as far away from your home as possible. In older homes with hollow concrete block foundations, runoff rainwater can fill the blocks until pressure forces that water through the mortar joints. Keeping rainwater draining away from your home will keep your basement drier.
Perform a condensation test
Do a wall condensation test. Tape either a 2-foot square piece of sheet plastic or aluminum foil to the basement wall. After a few days, check it to see if there is any sign of moisture. If it’s on the outside of the plastic, then water vapor is condensing out of the humidity in the house. But, if the moisture is forming on the inside against the wall, then there’s a moisture penetration problem. Homes with cement block basements will be more likely to have penetration problems. Waterproofing paint does go a long way to seal concrete walls in your basement. However, they don’t perfectly seal even if you apply several coats of paint. While it might stop most vapor infiltration, some moisture will find a way through. So, you want a barrier that is the best you can get.
Which insulation works best for basements?
Heat is energy and heat always moves toward cold. Insulation works by resisting the transfer of heat. For basement insulation, the rate at which a particular kind of insulation resists or slows down heat transfer is called the “R-value.” By comparison, an average home’s attic should be insulated to R-30 and walls better than R-11. For basements, the recommended amount is R-10 (2 inches) or better. Compared to an uninsulated concrete wall, this amount can reduce the amount of heat loss by 93%. However, more is better. Basements with walls insulated to R-20 (4 inches) saw annual savings ranging from $88 to $308.
For most homeowners, especially for those doing it themselves, the most cost-effective way to insulate their basement is by adding insulation to the inside. Insulation can be added to the outside, but the excavation required should be done by a professional and that is usually expensive and complicated.
Over the years, many homeowners and home building professionals have discovered that using combinations of fiberglass batts or blankets are poorly suited to handling the problems of basement moisture. This is due partly to the fact that paper faced insulation is a vapor retarder, not a barrier. In the winter, water vapor would pass through the insulation and condense against the cold concrete wall, wetting the insulation. In the summer, water vapor would move from the wall inwards and condense on the room-side of the insulation. The result in both cases was the same - a big wet and expensive mess.
Extruded polystyrene foam insulation
Extruded polystyrene foam insulation panels not only provide excellent basement insulation R-values in a compressed space (R-5 per inch) but they also have low moisture vapor permeability. That is, XPS can prevent most but not all water vapor from passing through. These panels can be glued onto concrete walls with an inexpensive foam adhesive. In most cases, just cut the panels to size and cover the wall from the floor to the top of the foundation wall. NOTE: As with the joist bay, foam insulation panels are required by code to be fire-protected by drywall.
Polyisocyanurate foam panels
For moisture penetration problems, polyisocyanurate (PISO) foam panels are faced with a vapor barrier already applied. Panels can be taped together to form a continuous barrier. It costs nearly twice as much as XPS and it tends to perform worse than XPS when average temperatures fall below 75°F.
If you decide to go with XPS insulation panels but have a moisture penetration problem, try this method:
After sealing all drafts and all the joist bays, seal the concrete walls with basement waterproofing paint to reduce the amount of vapor infiltration. Next, cut XPS panels to fit and glue these in place with the proper foam adhesive. When completely dry, tape all seams with foam joint tape. This adds another layer that reduces vapor infiltration further.
Next, staple 6-mil plastic sheeting to the mudsill (or sillplate) and let it hang down over the entire wall to the floor. The sheeting acts as a vapor barrier (vapor diffusion barrier) to prevent any more water vapor and moisture from entering the living space. Edges should overlap and be completely taped to make the barrier seamless and sealed. The bottom edge can be fastened to the very bottom of the wall with battens.
Finishing the wall
To finish, furring strips can then be attached through the plastic sheeting and foam to hold the drywall. Another option is to tape the bottom edge of the plastic sheeting to the floor. A covering wall can then be framed over the insulation with the plastic sheeting’s taped edge held in place by the wall’s bottom plate when the wall is fastened into place. By framing a covering wall, additional basement insulation can be placed before the drywall is installed over it.
- R-10 2-inch thick foam is glued to the sealed concrete block wall. Seams are taped after all the foam is in place.
- Plastic sheeting is draped over the foam to act as the moisture barrier.
- Plastic sheeting is stapled into the mudsill (or sillplate). Banding joist has already been sealed and covered with drywall.
- Studs for cover wall framed in place. Bottom edge of plastic sheeting visible at bottom.
- Cover wall with drywall with first coating of joint compound. Window opening with plastic sheet edges sealed and then finished.
Once the entire process of sealing and insulating your basement is complete, you’ll notice the difference in the comfort level of your home right away. It will be less humid overall and your basement will feel drier and warmer. Best of all, your energy usage will reflect the improved efficiency.


