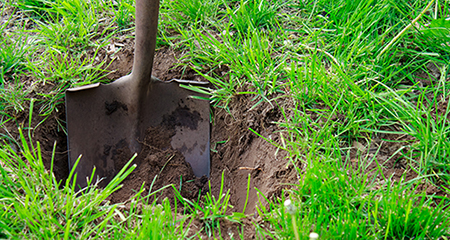
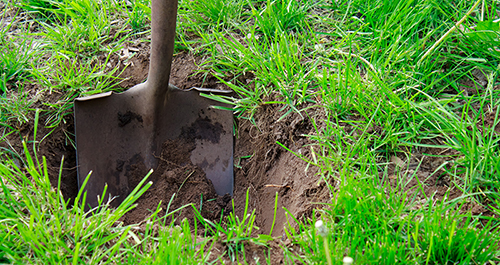
1. Check your lawn for frozen ground
Before you take the 1st step toward de-winterizing, you need to make sure your lawn agrees that winter is over. Use a shovel to dig at least 1 foot into the soil in an inconspicuous part of your lawn. If you strike frozen ground, you’re too early and should wait a week or two before conducting another dig test.
Starting your sprinkler system while the ground is still frozen can result in broken water lines during the startup process or even hours later, if the ground is cold enough to freeze the water in the lines. If your watering just can’t wait, you’ll want to hook up the hose and do it the old-fashioned way while the soil thaws.
2. Turn on your control panel
De-winterization starts at your sprinkler system’s brain — the main irrigation control panel. These are often installed outdoors, so you’ll probably need to wipe away a layer of dirt and clear out some cobwebs.
Turn on the control panel and review the current settings for time, date and irrigation zones. If your system has a battery backup and the batteries are more than 6 months old, this is a good time to replace them. All control panel models are a little different, so if you don’t have your system’s original documentation, find a copy online by searching for your panel’s model number.
3. Clean your sprinkler heads
One of the most time-consuming steps is the inspection and cleaning of every sprinkler valve and head. The bigger your lawn is, the more time this will take.
Complete these steps at each sprinkler head:
- Inspect the sprinkler head assembly for damage. If the nozzle is damaged, unscrew it from the head and buy a replacement at your local lawn care center. If there’s more extensive damage to the entire head assembly, the repair can be a bigger project that you might want to outsource to an irrigation maintenance professional.
- Clean the nozzles thoroughly. An old toothbrush helps with this job. Any obstruction will affect the spray pattern, and that could result in some areas getting too little water while others get too much.
- Make sure to shut off your irrigation valve, unless it’s the valve farthest from the main water source. You’ll want to leave this valve open and remove the sprinkler nozzle to allow air to escape when you turn on the water. If your system has multiple branches feeding off a main line, you should open the sprinkler valve and remove the nozzle of the last sprinkler on each branch line.
4. Slowly open the main water valve
The next step is to open the main water valve, and this is where rookies can make an expensive mistake. Opening the irrigation valve too quickly sends a rush of water and air through the system, creating an effect called a “water hammer.” This surge of pressure can crack pipes, break sprinkler valves and even send sprinkler heads rocketing into the air.
Slowly open the main valve until you can hear the water begin to flow, then wait for several minutes as water feeds into the main line. When you’re ready to continue, open the valve just a few degrees wider every couple of minutes until it’s fully open.
In a system where branch lines feed off the main line, there may be an additional valve where each branch line meets the main line. After completely filling the main line, you’ll need to repeat this slow-and-steady process at each branch line’s main valve.
Once all these valves are open, it’s time to check the faraway sprinkler valves that you left open earlier. With the sprinkler heads removed, any dirt and debris trapped in the line should be flushed out. As soon as the water flowing out looks clear, close the valve and screw the nozzle back into place.
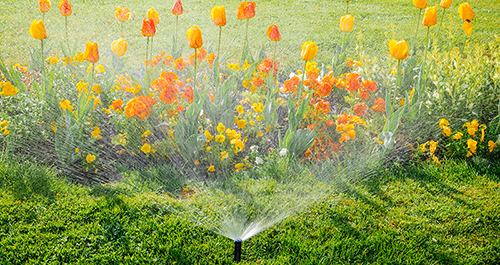
5. Check your irrigation zones
Your sprinkler system is now primed for its 1st watering of spring. And if you didn’t make any major changes to your system or landscaping since last year, you might not need to make any adjustments to your sprinkler nozzles. But it’s still worthwhile to test the irrigation of each of your zones, 1 at a time, to verify that your spray patterns are getting water where you need it.
Use your control panel to start the irrigation program for a single zone, then go watch your sprinklers at work. If you have any malfunctioning sprinkler heads, this is when you’ll notice them. And if your sprinklers have unusually low pressure, that’s often a sign of a water line break. You should watch for soggy spots to develop in your soil to pinpoint the area of the break, then shut down the water at the main irrigation valve until you can get it repaired.
If any nozzles need adjusting, take note of all the changes you want to make in the zone before turning off the sprinklers. You can only make the adjustments while the sprinklers are off, so this will spare you additional trips back and forth.
There are markings on top of each nozzle that indicate their spray patterns. To adjust the nozzle, unscrew the ring that holds it in place, lift it out of the head assembly and reinsert it with the markings pointing in the desired direction. Screw the ring back on, and you’re good to go.
After working through each zone individually, activate your full irrigation program for one final walk-through inspection. If you like what you see, you’re all done until it’s time for winterization!